
explainer
Why a Bigger 3D Print Uses So Much More Filament: The Cube Rule
By Uttam Regmi · Published 2026-07-12 · Updated 2026-08-23 · 6 min read · Fact-checked, sources cited

Scale a model to 200% and it uses eight times the filament, not two. This catches almost everyone the first time: you nudge a print “a little bigger,” come back, and the slicer says 14 hours and most of a spool. Nothing is broken. It’s geometry, and once you know the rule, you can predict it in your head.
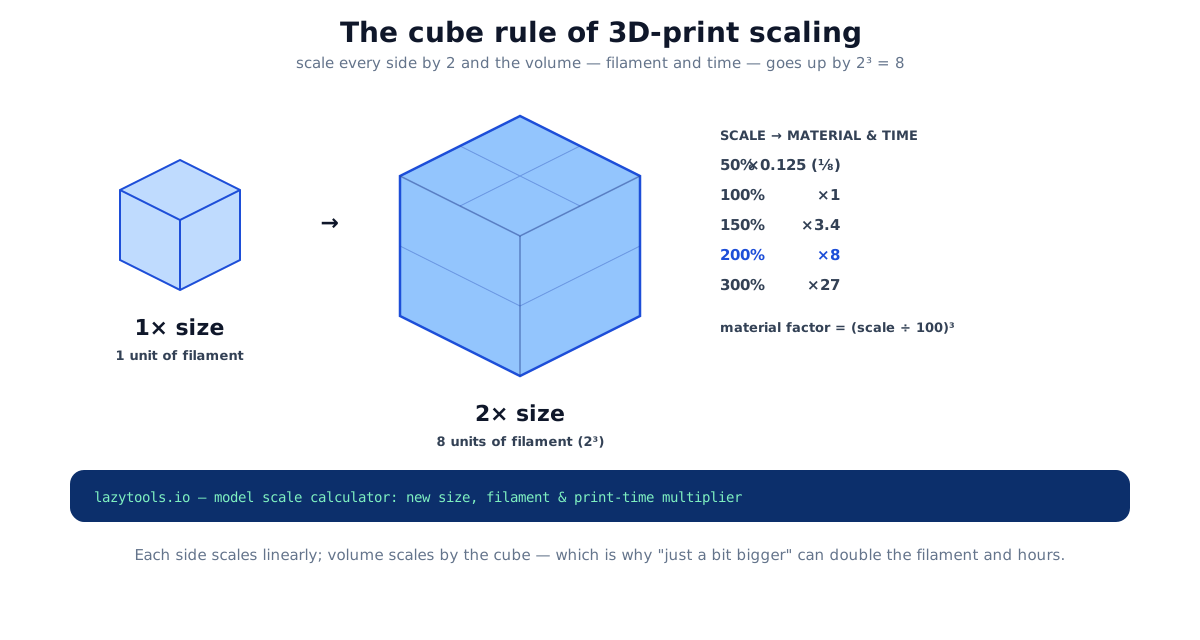
Why one dimension of “bigger” is really three
When you scale a model, you don’t stretch it in one direction. You grow it in all three at once: longer, wider and taller. The slider in your slicer says one number, but that number is applied to every axis simultaneously. Each of those axes multiplies by the same factor, so the space enclosed multiplies three times over.
Double the size, and you get 2 × 2 × 2 = 8 times the volume. Triple it and it’s 3 × 3 × 3 = 27. That’s the whole rule: the volume factor is the cube of the linear scale factor. Since the filament in a print (and the time to lay it down) is essentially proportional to volume, both follow the cube too.
A helpful mental picture: imagine the small model built from a single unit cube. To make a model twice as tall, twice as wide and twice as deep, you need to stack unit cubes 2 wide, 2 deep and 2 high, that’s eight of them, not two. The infographic above shows exactly this. The outside looks “twice as big,” but you are filling eight times the interior.
The numbers you’ll actually hit
| Scale | Each side | Filament & time |
|---|---|---|
| 50% | ×0.5 | ×0.125 (⅛) |
| 80% | ×0.8 | ×0.51 |
| 100% | ×1 | ×1 |
| 125% | ×1.25 | ×1.95 |
| 150% | ×1.5 | ×3.4 |
| 200% | ×2 | ×8 |
| 300% | ×3 | ×27 |
Notice how fast it runs away. Going from 100% to 125%, a change that barely looks different on screen, nearly doubles the material. That’s why “let’s just make it a bit bigger” is such a filament trap: the eye reads linear size, but the spool pays for volume.
Surface area follows a square rule, not a cube
There is a companion rule worth knowing. While volume (and therefore filament and time) scales with the cube, surface area scales with the square of the linear factor. Double the size and the outer skin only quadruples (2² = 4), while the inside octuples (2³ = 8).
That mismatch explains a few things printers notice:
- Paint, primer and coating track surface area, so they grow far more slowly than filament does when you scale up.
- Big prints feel “hollow” for their weight relative to how imposing they look, because so much of the added volume is interior infill rather than shell.
- Cooling and warping behaviour changes as parts get larger, since the ratio of skin to mass keeps shifting. This is the same square-cube law engineers and biologists use to reason about why large structures can’t simply be scaled-up copies of small ones.
Worked example: a 60 mm figurine at 180%
Say your slicer reports the original 60 mm-tall model as 28 g of filament and a 4 h 30 m print. You want it at 180%.
- Scale factor: 180 ÷ 100 = 1.8.
- New height: 60 mm × 1.8 = 108 mm (each other dimension grows 1.8× too).
- Volume multiplier: 1.8³ = 1.8 × 1.8 × 1.8 ≈ 5.83.
- New filament: 28 g × 5.83 ≈ 163 g, well over half a standard 250 g coil, from what looked like a modest bump.
- New time: 4.5 h × 5.83 ≈ 26 h, an overnight-plus print instead of an afternoon.
That is the value of doing the cube in your head before you commit: a “slightly larger” figurine just turned into a two-day, most-of-a-spool job.
It cuts the other way too
The cube rule is also why test prints are scaled down. Printing a model at 50% to check it fits, that overhangs behave, or that a joint clicks together costs about an eighth of the filament and a fraction of the time, a cheap way to catch a problem before committing to the full-size print. Calibration objects, draft minis and fit-check dry runs all lean on the same maths.
There is a limit, of course: shrink too far and fine detail drops below what your nozzle and layer height can resolve, and thin walls can vanish. Scaling down is a material-saver, not a magnifier, the geometry gets cheaper, but the features have to stay printable.
How to plan a resize
If your slicer told you the original print was, say, 40 g and 5 hours, you can predict a scaled version before re-slicing:
- Work out the factor: desired scale ÷ 100, then cube it. For 150%: 1.5³ ≈ 3.4.
- Multiply: 40 g → ~136 g, and 5 h → ~17 h.
- Check the spool and the bed: 136 g may not leave enough on a partly-used coil, and a 150%-taller model may no longer fit your build volume.
- Re-slice to confirm: infill, walls and supports don’t scale as a perfect cube, so the slicer’s number is the exact one, but the cube estimate gets you within range instantly.
What the cube rule does not capture
The estimate is a starting point, and a good one, but a few printed-part realities pull the true number slightly off a clean cube:
| Factor | Effect on the estimate |
|---|---|
| Wall count / perimeters | Fixed-width walls are a larger share of a small print and a smaller share of a big one, so tiny prints use proportionally more, large prints slightly less |
| Infill percentage | Infill fills interior volume, so it broadly follows the cube, but changing the infill % when you resize breaks the comparison |
| Supports | Support material can grow faster than the model itself for tall or overhang-heavy scale-ups |
| Layer height | Keeping the same layer height on a taller print adds proportionally more layers, nudging time upward |
For most practical planning these are second-order, the cube rule still lands you close. Re-slice when you need the exact grams for a tight spool or a paid job.
Do the maths in your browser
The model scale calculator turns a scale percentage into the new dimensions and the material/time multiplier, and includes a fit-to-bed helper that finds the largest scale that still fits your printer. Pair it with the filament calculator to convert weight and length, and the filament cost calculator to price the resized print before you start it. Like every LazyTools tool, they run entirely in your browser, nothing uploaded, nothing stored.
The cube rule is exact for a uniform solid scaled equally in all three axes: volume = (linear factor)³. Real prints include infill, perimeters and supports that don’t scale perfectly, so use the rule for a fast estimate and re-slice for the precise filament weight and time.
Frequently asked questions
Does scaling up a 3D model use more filament?
Yes, far more than you'd expect. Filament use scales with volume, which is the cube of the size factor. Scaling a model to 200% (twice as long, wide and tall) uses about 8× the filament, not 2×.
How much more filament does a 200% scale use?
About eight times as much. Doubling each of the three dimensions multiplies the volume by 2 × 2 × 2 = 8, and filament tracks volume, so both the material and the print time go up roughly eightfold.
Why does a slightly bigger print take so much longer?
Because print time, like filament, follows volume, the cube of the scale. A model at 130% isn't 30% more; it's 1.3³ ≈ 2.2×, more than double the material and time. Small size increases have outsized effects.
How do I calculate filament for a scaled model?
Multiply the original filament amount by (scale ÷ 100) cubed. For 150%, that's 1.5³ ≈ 3.4×. The model scale calculator does this and shows the new dimensions; re-slicing gives the exact grams.
Does scaling down save filament?
Yes, dramatically. Scaling to 50% uses about ⅛ of the filament (0.5³ = 0.125) and a fraction of the time, which is why test prints are often scaled down first.
Is the cube rule exact?
For a uniform solid scaled equally in all three axes, yes, volume is exactly the cube of the linear factor. In practice infill, walls and supports mean the printed filament isn't a perfect cube relationship, so treat it as very close and re-slice for the exact figure.