
how-to
How to Crop an Image to Any Aspect Ratio
By Uttam Regmi · Published 2026-07-28 · Updated 2026-07-28 · 6 min read · Fact-checked, sources cited
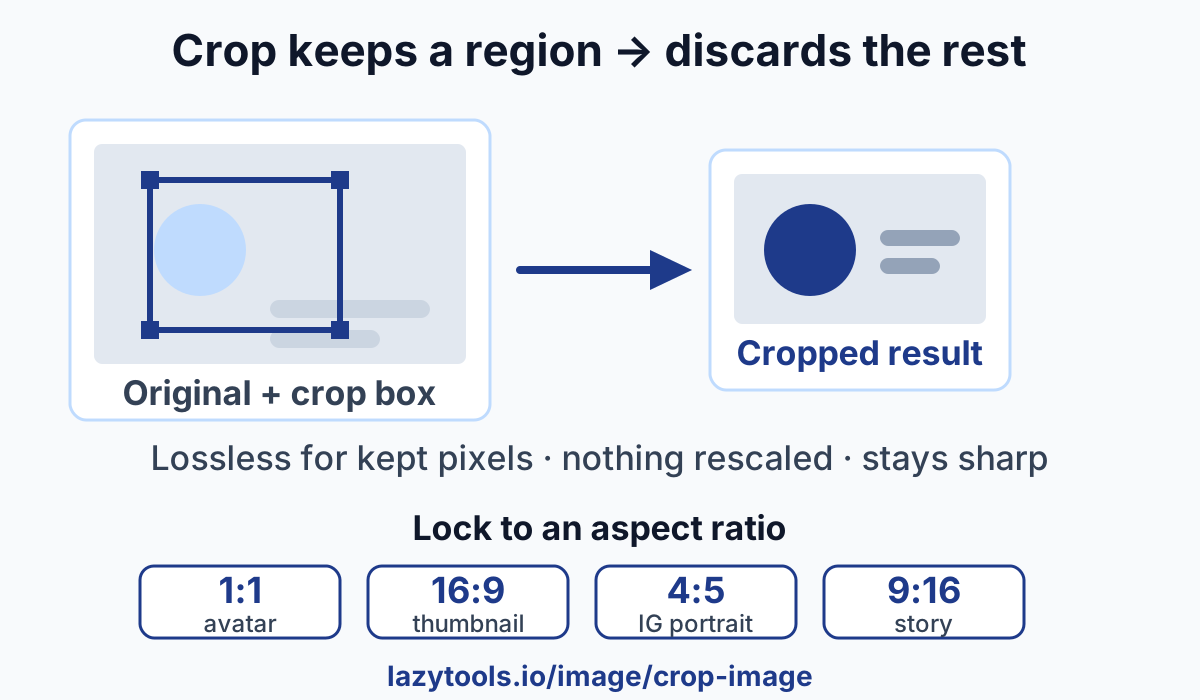
To crop an image, open it in a cropper, drag the crop box over the part you want to keep, or type an exact X, Y, width and height in pixels, and export the result. That’s the whole job: cropping keeps a rectangular region of your picture and discards everything outside it. If you want a specific shape, lock the crop box to an aspect ratio like 1:1 or 16:9 first. This guide covers how to crop an image, which ratio to pick, and why cropping is not the same as resizing.
How to crop an image, step by step
Cropping is one of the simplest edits there is. With the Crop Image tool it goes like this:
- Open your image. Drop in a photo, screenshot or graphic. It loads straight into the browser.
- Position the crop box. Drag the box over the part you want to keep. Everything outside it will be discarded.
- Be exact if you need to. Instead of dragging, type an exact X and Y (the top-left corner) plus the width and height in pixels. This is how you crop to a precise size every time.
- Lock a ratio (optional). If the result has to be a square or a widescreen shape, lock the box to an aspect ratio so it can’t drift off-proportion.
- Export. Save the cropped region as a PNG. Only the pixels inside the box are kept.
Because you’re just choosing a rectangle, there’s nothing to “process”, the region you keep is the region you get.
Crop to a specific aspect ratio
Most of the time you’re not cropping to a random shape; you’re cropping to fit a specific place. Locking the crop box to an aspect ratio keeps the proportions correct so the image isn’t stretched or awkwardly letterboxed when it lands. Here’s where the common ratios are used:
| Aspect ratio | Where it’s used |
|---|---|
| 1:1 (square) | Most profile pictures and avatars |
| 16:9 | YouTube and most video thumbnails |
| 4:5 | Instagram portrait posts |
| 9:16 | Stories, reels and vertical video |
| 4:3 | Classic photo prints and older cameras |
| 3:2 | Classic photo prints and most DSLRs |
A quick way to decide: square (1:1) for anything that shows up as a small circle or tile, 16:9 for anything that plays like a video, and the tall ratios (4:5, 9:16) for phone-first, vertical feeds.
Working out the crop dimensions
An aspect ratio is just width divided by height, so any ratio gives you the height from the width (or the reverse) with one multiplication. For a target ratio of W:H, the height of your crop box is width × H ÷ W.
Say you want a 16:9 crop and you’ve decided the box should be 1280 pixels wide. The height is 1280 × 9 ÷ 16 = 720. Type width 1280 and height 720 and you have an exact 16:9 region, the same math that makes 1920×1080 and 3840×2160 all “16:9.” A few common results:
| Ratio | If width is | Height comes out | Typical use |
|---|---|---|---|
| 1:1 | 1080 | 1080 | Square avatar |
| 16:9 | 1280 | 720 | HD thumbnail |
| 16:9 | 1920 | 1080 | Full-HD banner |
| 4:5 | 1080 | 1350 | Instagram portrait |
| 9:16 | 1080 | 1920 | Story / reel |
There’s a ceiling, though: your crop can never be larger than the source. If a 4000×3000 photo needs to become a square, the biggest square you can take is 3000×3000 (limited by the shorter side), and you slide that box left or right to choose what stays in frame. Locking the ratio in the tool handles this for you. It simply won’t let the box grow past the edges of the image, but it’s worth knowing why a square crop of a wide photo “loses” the sides: there is no pixel data out there to keep.
A worked example: a clean YouTube thumbnail
Suppose you have a 4032×3024 phone screenshot (a 4:3 shape) and you want a 16:9 thumbnail. Because 16:9 is wider than 4:3, the full width fits but the height has to shrink. At the full 4032-pixel width, a 16:9 box is 4032 × 9 ÷ 16 = 2268 pixels tall. So you lock the box to 16:9, let it span the whole width, and drag it up or down over the 3024-pixel-tall image to pick which 2268-pixel band you keep, usually centred on the subject. Export, and you get a 4032×2268 PNG that drops straight into a 16:9 slot with no letterboxing and no stretching.
Cropping vs resizing (they’re not the same)
This trips people up constantly, so it’s worth being clear:
- Cropping cuts out a rectangular region at full size and discards the rest. It changes what’s in the frame. It does not rescale anything, which is why it’s lossless for the pixels you keep, text and fine detail stay exactly as sharp as the original.
- Resizing rescales the whole image to new dimensions. It changes how big the frame is, and shrinking always throws away some detail.
So if your goal is “show less of the photo,” crop. If your goal is “make the file smaller” or “fit an exact pixel dimension,” resize. They’re often used together, crop to the right composition first, then resize to the size you need. To make a file fit an upload limit, use the resize-to-KB tool, which shrinks to a target file size; to hit exact dimensions, use the image resizer.
Common mistakes
- Cropping when you meant to resize. Cropping won’t shrink a file to fit a “max 2 MB” upload box. It just changes the framing. If the form is complaining about size or dimensions, you need a resize tool, not a crop.
- The wrong ratio for the platform. A 16:9 thumbnail forced into a square avatar slot gets center-cropped by the platform, often chopping off the important part. Crop to the ratio the destination actually uses.
- Cropping too tight. Removing all the headroom or breathing space around your subject makes an image feel cramped, and leaves nothing to spare if the platform crops it further. Leave a little margin.
- Re-compressing repeatedly. Every time you export a JPG, it’s re-compressed and loses a bit more quality. Crop once from the original where you can, and prefer a PNG export so the region you kept isn’t re-compressed.
Crop it locally, keep it private
The Crop Image tool runs entirely in your browser using the Canvas API. Your image is never uploaded to a server, which matters when you’re cropping a screenshot with personal details, an ID, or anything you’d rather not hand to a stranger’s website. Drag or type your crop box, lock a ratio if you need one, and export a sharp PNG of exactly the region you kept. No account, no upload, and it works offline once the page has loaded.
Cropping keeps a rectangular region of an image and discards the rest; it is lossless for the pixels you keep because nothing is rescaled. The LazyTools Crop Image tool crops in the browser with the Canvas API and exports a PNG, so the image is never uploaded. This is general how-to information.
Frequently asked questions
How do I crop an image?
Open the image in a cropper, drag the crop box over the part you want to keep, and export. If you need to be exact, type the X and Y position plus the width and height in pixels instead of dragging. A browser-based tool like the LazyTools Crop Image tool does this locally and exports a PNG of the region you kept, nothing is uploaded.
How do I crop an image to a square or 16:9?
Lock the crop box to the ratio you want before you position it. Choose 1:1 for a square (profile pictures), or 16:9 for a widescreen thumbnail. The box then keeps that shape as you resize it, so the exported image comes out at exactly the right proportions.
Does cropping reduce image quality?
No. Cropping is lossless for the pixels you keep. It simply discards the area outside the crop box and does not rescale anything, so text and detail stay as sharp as the original. The LazyTools tool exports a PNG, so the region you kept isn't re-compressed.
What's the difference between cropping and resizing?
Cropping cuts out a rectangular region at full size and throws the rest away. Resizing rescales the whole image to new dimensions. Cropping changes what's in the frame; resizing changes how big the frame is. To make a file smaller for an upload limit, resize instead of (or after) cropping.
What aspect ratio should I use for a profile picture or a thumbnail?
Use 1:1 (square) for most profile pictures and avatars, and 16:9 for YouTube and most video thumbnails. For Instagram use 4:5 for a portrait post and 9:16 for a story or reel. Classic photo prints use 4:3 or 3:2.
Is my image uploaded when I crop it?
Not with the LazyTools Crop Image tool. It crops entirely in your browser using the Canvas API, so the image never leaves your device. That makes it safe for cropping sensitive screenshots, IDs or anything you'd rather not send to a server.